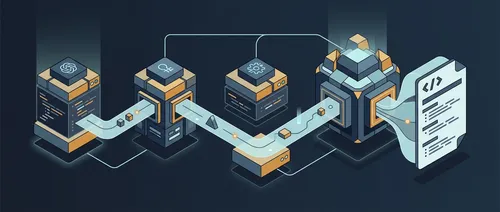
当你用 GitHub Copilot SDK 构建多 Agent 系统时,核心思路其实很简单:一个 CopilotClient 可以驱动多个独立的 CopilotSession 实例,每个 Session 有自己的专属系统提示,彼此之间没有任何记忆共享。
这篇文章要实现的是一个控制台程序,接收一个 C# 源文件路径,依次通过三个专职 Agent(代码审查、文档生成、测试建议)处理,最后把三份输出拼成一个 Markdown 报告保存到磁盘。
如果你还没接触过 GitHub Copilot SDK,建议先看 GitHub Copilot SDK for .NET: Complete Developer Guide 打好基础,这里默认你已经了解 CopilotClient、CopilotSession、流式响应和基本配置。
要构建什么
这个 CLI 工具读取一个 C# 源文件,按顺序执行三个任务:
- CodeReviewAgent — 找 Bug、SOLID 违规、性能问题
- DocumentationAgent — 生成 XML 文档注释和用法示例
- TestingAgent — 按 AAA 结构写 xUnit v3 测试用例
- AgentPipeline — 收集三份输出,拼成统一的
{filename}.analysis.md
项目目录结构如下:
ai-multi-agent/
  ai-multi-agent.csproj
  appsettings.json
  Program.cs
  Configuration/
    MultiAgentConfig.cs
  Agents/
    AgentBase.cs               (abstract: protected RunAsync)
    AgentPipeline.cs           (sequential orchestration)
    CodeReviewAgent.cs
    DocumentationAgent.cs
    TestingAgent.cs
每个 Agent 只做一件事。AgentBase 封装所有 SDK 交互。AgentPipeline 负责编排。Agent 本身只关注自己的领域。
完整源码:devleader/copilot-sdk-examples
AgentBase 模式
AgentBase 是整个多 Agent 系统的架构核心。所有专职 Agent 都继承它,SDK 的所有”仪式”——Session 创建、事件处理、流式内容累积、TaskCompletionSource 同步机制、资源释放——全部封装在这里。派生类只需要提供系统提示和用户消息。
完整的 AgentBase.cs:
using GitHub.Copilot.SDK;

namespace AiMultiAgent.Agents;

public abstract class AgentBase
{
    protected readonly CopilotClient Client;

    protected AgentBase(CopilotClient client)
    {
        Client = client;
    }

    protected async Task<string> RunAsync(
        string systemPrompt,
        string userMessage,
        string agentLabel,
        CancellationToken ct = default)
    {
        Console.ForegroundColor = ConsoleColor.Cyan;
        Console.WriteLine($"[{agentLabel}] Starting...");
        Console.ResetColor();

        var reply = new System.Text.StringBuilder();
        var tcs = new TaskCompletionSource(TaskCreationOptions.RunContinuationsAsynchronously);

        await using var session = await Client.CreateSessionAsync(new SessionConfig
        {
            Streaming = true,
            SystemMessage = new SystemMessageConfig
            {
                // Replace 确保每个 Agent 只拥有自己的角色,没有继承来的上下文
                Mode = SystemMessageMode.Replace,
                Content = systemPrompt
            }
        });

        session.On(evt =>
        {
            switch (evt)
            {
                case AssistantMessageDeltaEvent delta:
                    Console.Write(delta.Data.DeltaContent);
                    reply.Append(delta.Data.DeltaContent);
                    break;

                case AssistantMessageEvent msg:
                    Console.Write(msg.Data.Content);
                    reply.Append(msg.Data.Content);
                    break;

                case SessionIdleEvent:
                    Console.WriteLine();
                    tcs.TrySetResult();
                    break;

                case SessionErrorEvent err:
                    Console.ForegroundColor = ConsoleColor.Red;
                    Console.WriteLine($"[{agentLabel} Error] {err.Data.ErrorType}: {err.Data.Message}");
                    Console.ResetColor();
                    tcs.TrySetException(new Exception(err.Data.Message));
                    break;
            }
        });

        await session.SendAsync(new MessageOptions { Prompt = userMessage });
        using var reg = ct.Register(() => tcs.TrySetCanceled(ct));
        await tcs.Task;

        Console.ForegroundColor = ConsoleColor.Green;
        Console.WriteLine($"[{agentLabel}] Complete.");
        Console.ResetColor();

        return reply.ToString();
    }
}
所有 SDK 复杂性都在这里。每个派生 Agent 继承完整的事件处理、流式传输和清理逻辑,自己不需要写任何 SDK 样板代码。
几个设计细节值得注意:
await using var session意味着RunAsync返回时 Session 立即释放资源,不会泄漏。每个 Agent 创建 Session、发送消息、等待SessionIdleEvent,然后using块自动清理。agentLabel让多 Agent 的终端输出可读。三个 Agent 顺序运行时,你会看到清晰的[Code Review Agent] Starting...和[Code Review Agent] Complete.边界,不会混在一起。TaskCompletionSource+SessionIdleEvent是同步机制的标准用法。SessionIdleEvent在模型完成输出时触发,tcs.TrySetResult()解除await tcs.Task阻塞,RunAsync返回累积的回复字符串。
为什么用 SystemMessageMode.Replace
每个专职 Agent 需要自己的角色。代码审查 Agent 应该像代码审查者一样思考,而不是像通用的 Copilot 助手。文档 Agent 应该专注于 XML 注释,而不是去找 Bug。
SystemMessageMode.Replace 完全覆盖该 Session 的默认 Copilot 系统提示。Session 释放后,新 Session 对上一个 Session 的系统提示一无所知——代码审查 Agent 的”你是一位专业的代码审查者”角色不会渗透进文档 Agent 的 Session。
另一个选项是 Append,它会让默认 Copilot 行为和你的自定义指令同时生效。这会让每个 Agent 的专注度降低,输出更不确定——你会得到一个仍然像通用助手的代码审查者,混合了审查角色。
用 Replace,每个 CopilotSession 获得一张白纸。结合 await using var session 在 Agent 之间的释放,你获得完全的隔离——没有状态、没有上下文、没有 Agent 间的交叉污染。
三个专职 Agent
每个 Agent 只有 15-20 行代码,因为 AgentBase 处理了其他所有事情。派生类只定义 Agent 做什么——系统提示指定角色,用户消息指定任务。
CodeReviewAgent.cs:
using GitHub.Copilot.SDK;

namespace AiMultiAgent.Agents;

public sealed class CodeReviewAgent : AgentBase
{
    public CodeReviewAgent(CopilotClient client) : base(client) { }

    public Task<string> ReviewAsync(string fileName, string sourceCode, CancellationToken ct = default) =>
        RunAsync(
            systemPrompt: """
                You are an expert C# code reviewer with deep knowledge of .NET best practices.
                Review code for: correctness, performance, SOLID principles, naming conventions,
                error handling, async patterns, and security concerns.
                Be specific and actionable. Use Markdown with severity labels:
                - **Critical**: bugs or security issues that must be fixed
                - **Major**: significant design or performance concerns
                - **Minor**: style or minor improvements
                """,
            userMessage: $"""
                Review this C# file: `{fileName}`

                ```csharp
                {sourceCode}
                ```

                Provide a structured code review with specific observations.
                Group findings by severity (Critical / Major / Minor).
                """,
            agentLabel: "Code Review Agent",
            ct: ct);
}
DocumentationAgent.cs:
public sealed class DocumentationAgent : AgentBase
{
    public DocumentationAgent(CopilotClient client) : base(client) { }

    public Task<string> GenerateAsync(string fileName, string sourceCode, CancellationToken ct = default) =>
        RunAsync(
            systemPrompt: """
                You are a technical documentation specialist for C# and .NET.
                Generate clear, accurate XML documentation comments for public members.
                Focus on WHAT the code does -- not HOW it does it internally.
                Format output as Markdown containing ready-to-use XML doc comment snippets.
                """,
            userMessage: $"""
                Generate documentation for: `{fileName}`

                ```csharp
                {sourceCode}
                ```

                Provide:
                1. A high-level summary of what this file/class does
                2. XML <summary>, <param>, and <returns> comments for all public members
                3. A usage example showing the typical calling pattern
                """,
            agentLabel: "Documentation Agent",
            ct: ct);
}
TestingAgent.cs:
public sealed class TestingAgent : AgentBase
{
    public TestingAgent(CopilotClient client) : base(client) { }

    public Task<string> SuggestAsync(string fileName, string sourceCode, CancellationToken ct = default) =>
        RunAsync(
            systemPrompt: """
                You are an expert in .NET testing with xUnit v3 and Moq.
                Write complete, compilable xUnit test methods following the AAA pattern
                (Arrange-Act-Assert). Use the Given_When_Then naming convention.
                Cover: happy paths, boundary values, null inputs, and exception scenarios.
                """,
            userMessage: $"""
                Write unit tests for: `{fileName}`

                ```csharp
                {sourceCode}
                ```

                Produce complete xUnit test class(es) with:
                - All necessary using statements
                - Mock setup where dependencies exist
                - At least one test per public method
                - Edge cases and error condition tests
                """,
            agentLabel: "Testing Agent",
            ct: ct);
}
这三个 Agent 没有一个导入了事件类型、创建 TaskCompletionSource 实例、或者触碰 Session 生命周期。它们全部委托给 AgentBase.RunAsync。要添加第四个 Agent——比如 SecurityAgent 或 ArchitectureAgent——只需要写 15 行新代码,配一个新的系统提示和方法名,管道已经就绪。
AgentPipeline 编排
AgentPipeline 负责整个多 Agent 分析系统的编排:创建 Agent、顺序运行、拼接报告。
using System.Text;
using GitHub.Copilot.SDK;

namespace AiMultiAgent.Agents;

public sealed class AgentPipeline
{
    private readonly CopilotClient _client;

    public AgentPipeline(CopilotClient client)
    {
        _client = client;
    }

    public async Task<string> RunAsync(
        string fileName,
        string sourceCode,
        CancellationToken ct = default)
    {
        // 每个 Agent 顺序、独立运行,各自拥有独立的 Session
        var review = await new CodeReviewAgent(_client).ReviewAsync(fileName, sourceCode, ct);
        var docs = await new DocumentationAgent(_client).GenerateAsync(fileName, sourceCode, ct);
        var tests = await new TestingAgent(_client).SuggestAsync(fileName, sourceCode, ct);

        return BuildReport(fileName, review, docs, tests);
    }

    private static string BuildReport(
        string fileName,
        string codeReview,
        string documentation,
        string tests)
    {
        var sb = new StringBuilder();

        sb.AppendLine($"# Multi-Agent Analysis: `{fileName}`");
        sb.AppendLine();
        sb.AppendLine($"_Generated: {DateTimeOffset.UtcNow:yyyy-MM-dd HH:mm:ss} UTC_");
        sb.AppendLine();

        sb.AppendLine("---");
        sb.AppendLine();
        sb.AppendLine("## Code Review");
        sb.AppendLine();
        sb.AppendLine(codeReview);
        sb.AppendLine();

        sb.AppendLine("---");
        sb.AppendLine();
        sb.AppendLine("## Documentation");
        sb.AppendLine();
        sb.AppendLine(documentation);
        sb.AppendLine();

        sb.AppendLine("---");
        sb.AppendLine();
        sb.AppendLine("## Suggested Tests");
        sb.AppendLine();
        sb.AppendLine(tests);

        return sb.ToString();
    }
}
三个顺序的 await 调用——代码审查完成后,文档生成开始,然后是测试建议。没有交错,没有竞争条件,Agent 之间没有共享状态。
BuildReport 是纯字符串拼接,对 SDK 一无所知——只是把三个字符串和 Markdown 标题组合起来。这个分离意味着你可以独立测试 BuildReport、换掉输出格式,或者添加第四个部分,而不用碰任何 Agent 逻辑。
new CodeReviewAgent(_client) 传入共享的 CopilotClient——Agent 共享客户端基础设施,不共享 Session 状态。客户端处理连接、认证和传输;每个 Agent 通过该客户端独立创建自己的 CopilotSession。
入口点
Program.cs 保持精简,只负责 I/O、配置和组装:
var sourceCode = await File.ReadAllTextAsync(targetFile);
var fileName = Path.GetFileName(targetFile);

await using var client = new CopilotClient(clientOptions);
await client.StartAsync();

var pipeline = new AgentPipeline(client);
var report = await pipeline.RunAsync(fileName, sourceCode);

var reportPath = Path.ChangeExtension(targetFile, ".analysis.md");
await File.WriteAllTextAsync(reportPath, report);责任分离贯穿全局:Program.cs 负责 I/O 和客户端初始化;AgentPipeline 负责编排;AgentBase 负责 SDK 交互;每个派生 Agent 只负责自己的领域专业知识。没有任何类在做不止一件事。
输出示例
对 OrderProcessor.cs 运行管道后,生成的报告结构如下(节选):
# Multi-Agent Analysis: `OrderProcessor.cs`

_Generated: 2026-03-31 14:22:05 UTC_

---

## Code Review

### Critical
- **Missing null check on line 42**: `customer.Email` is accessed without null check...

### Major
- **ProcessAsync lacks timeout handling**: The method awaits external calls without...

---

## Documentation

`OrderProcessor` is a service that coordinates order placement and inventory updates.

```csharp
/// <summary>
/// Processes an order and returns the confirmation result.
/// </summary>
/// <param name="order">The order to process. Cannot be null.</param>
/// <returns>An <see cref="OrderResult"/> indicating success or failure.</returns>
public async Task<OrderResult> ProcessAsync(Order order)
Suggested Tests
public class OrderProcessorTests
{
    [Fact]
    public async Task ProcessAsync_ValidOrder_ReturnsSuccessResult()
    {
        // Arrange
        var sut = new OrderProcessor(Mock.Of<IInventoryService>());
        var order = new Order { CustomerId = 1, Items = [new OrderItem { ProductId = 42 }] };

        // Act
        var result = await sut.ProcessAsync(order);

        // Assert
        Assert.True(result.Success);
    }
}
三个 Agent,一个文件,一份报告。输出可以直接使用——把 XML 注释复制进源码,从测试建议创建测试文件,根据代码审查的严重等级优先排序修复工作。

## 顺序执行 vs 并行执行

你可以用 `Task.WhenAll` 并行运行三个 Agent。理论上听起来能快 3 倍,实际上会带来不必要的复杂性。

GitHub Copilot SDK 对一个客户端同时运行多个 Session 的并发行为没有文档说明。顺序执行更安全、更简单、更容易调试。如果 `DocumentationAgent` 失败,代码审查的输出已经被捕获了——你可以记录它、保存部分结果或只重试失败的 Agent,这些在并行运行时都不容易实现。

顺序执行也提供自然的速率限制。Copilot API 有速率限制,同时运行三个 API Session 可能触发。一次一个保持可预测性,避免重试复杂性。

对于批量分析工具来说,延迟的权衡是可以接受的——分析一个文件并保存报告,30-60 秒总时间完全没问题。

## 关键发现

用 GitHub Copilot SDK 在 C# 中构建多 Agent 分析系统揭示了几个普遍适用的模式:

- **一个 `CopilotClient` 可以干净地处理多个顺序 Session**——每个 Agent 不需要独立的客户端实例
- **`AgentBase` 消除了重复的 SDK 样板**,否则这些代码会出现在每个 Agent 实现中
- **`await using var session` 在 `RunAsync` 内部**保证每个 Agent 完成后立即释放 Session
- **`SystemMessageMode.Replace`** 是专职 Agent 的正确选择——`Append` 会让默认 Copilot 行为保持激活,模糊 Agent 的专注点
- **顺序管道**比并行替代方案更简单、更可预测,并且自然地限制了速率

## 参考

- [Build a Multi-Agent Analysis System with GitHub Copilot SDK in C#](https://www.devleader.ca/2026/03/31/build-a-multiagent-analysis-system-with-github-copilot-sdk-in-c)
- [GitHub Copilot SDK for .NET: Complete Developer Guide](https://www.devleader.ca/2026/02/26/github-copilot-sdk-for-net-complete-developer-guide)
- [Advanced GitHub Copilot SDK in C#: Tools, Hooks, Multi-Model, and Multi-Agent Patterns](https://www.devleader.ca/2026/03/04/advanced-github-copilot-sdk-in-c-tools-hooks-multimodel-and-multiagent-patterns)
- [GitHub Copilot SDK vs Semantic Kernel: When to Use Each in C#](https://www.devleader.ca/2026/03/30/github-copilot-sdk-vs-semantic-kernel-when-to-use-each-in-c)
- [devleader/copilot-sdk-examples 源码](https://github.com/devleader/copilot-sdk-examples/tree/master/ai-multi-agent)